Pages

Showing posts with label Very Many Tubes. Show all posts

Saturday, January 19, 2019

Endless Love

Endless Love
Kit Endless Love by Michelle's Myths
Tags By Barbara Butler
Tubes by ©Mega Dreams and ©VeryMany


~§~Michelle's Myths~§~
I used the lovely kit Endless Love.  This lovely kit has 148 Elements 16 Papers and 4 Tubes.  I'm using the tubes that come with the kit they are by ©MegaDreams.  

This kit can be found at the following stores.

Saturday, May 28, 2016

Summer Sunset

Summer Sunset
©Barbara Butler
May 2016


Supplies:
Kit:  Summer Sunset  by Amy Marie.  This kit can be found at 
Template:  774 by Millies PSP Madness
Tube:  
Font:  
Special Settings:  All Elements will be re sized by 75% unless otherwised stated.  

Open up the template and check to make sure it is at 72DPI.  Duplicate it and close the original.  Delete the copyright layer and re size the canvas to a bigger size.

PAPERS:

Layer 5:  Select all, float, defloat.  Paste Pp13 into the selection, select none.

Layer 6:  Select all, float, defloat.  Paste Pp2 into the selection, select none.

Layer 3:  Select all, float, defloat.  Paste Pp4 into the selection, select none.

Layer 2:  Select all, float, defloat.  Paste Pp7 into the selection, select none.

Layer 4:  Select all, float, defloat.  Paste Pp9 into the selection, select none.

Layer 1:  Select all, float, defloat.  Paste Pp15 into the selection, select none.

Layers 8&9:  Using the Manual Colorization tool change the color of these levels.

ELEMENTS:

C/P Element 4 on to the canvas.  Re size it once.  Place it on the left side.

C/P Element 11 on to the canvas.  Re size it twice.  Flip it horizontally and place it on the bottom left and in front of the other elements.

C/P Element 17 on to the canvas.  Re size it once.  Place it on the left side and behind the other elements.

C/P Element 18 on to the canvas.  Re size it once.  Place it on the bottom left and behind Element 11.

C/P Element 35 on to the canvas.  Place it on the bottom right.

C/P Element 40 on to the canvas.  Place it on the top right.  Duplicate it, re size the duplicate once and move it to the left of the original.  Duplicate this one and move this one over to the right of the original.

C/P Element 45 on to the canvas.  Place it on the right side and behind the other elements.

C/P Element 63 on to the canvas.  Place it on the bottom and behind the other elements.

C/P Element 65 on to the canvas twice.  Place them where you would like.

C/P Element 6 on to the canvas.  Re size it five times.  Place it on top of Element 63.

Paste Tube(s) of choice on to the canvas.  Re size it if needed.  Place to your liking.

Add name and save as a pspimage.  Add any effects you would like.  Crop and re size the tag.  Save as a png and you are done.

Thank you for taking a look at my tut.  I hope you have enjoyed it.

Saturday, April 23, 2016

Butterfly Beauty

Butterfly Beauty
©Barbara Butler
April 2016


Supplies:
Kit:  Butterfly Beauty  by Amy Marie.  This kit can be found at the following stores 
 Template:  804 by Millies PSP Madness
Tube:  Blaze by VeryMany.  You can fine this tube at Very Many Tubes
Font:  Lyric Dragon.  This font can be found at Dafont
Special Settings:  Elements are re sized by 75% unless otherwised stated.

Open up the template and check to make sure it is at 72DPI.  Duplicate and close the original.  Delete the copyright layer and re size the canvas to a bigger size so the elements will fit.

Paper Layers:

Layer 1:  Select all, float, deflate.  Paste Pp18 into the selection, select none.  Repeat for Layer 2.

Layer 3:  Select all, float, deflate.  Paste Pp11 into the selection, select none.  Repeat for Layer 4.

Layer 5:  Select all, float, deflate.  Paste Pp4 into the selection, select none.  Repeat for Layer 6.

Layer 7:  Select all, float, deflate.  Paste Pp2 as a new layer, invert the selection and hit the delete key, select none.  Close or delete the original layer.  Repeat for layers 8 and 9.

Layer 12:  Select all, float, deflate.  Paste Pp6 as a new layer, invert the selection and hit the delete key, select none.  Close or delete the original layer.  Repeat for Layer 14.  Add a gradient glow.

Layer 11:  Select all, float, deflate.  Paste Pp7 as a new layer, invert the selection and hit the delete key, select none.  Close or delete the original layer.  Add a gradient glow.  Repeat for Layer 13.

Layer 10:  Select all, float, deflate.  Paste Pp7 into the selection, select none.

Merge all the word art layers together.  Move over to the bottom right and add a drop shadow with the following settings:  V:4, H:6, OP:86, Blur:2  Color:  #300719.

Elements:

C/P Element 3 on to the canvas.  Place it on the bottom right and behind the merged word art layers.

C/P Element 13 on to the canvas.  Re size it twice.  Place it on the bottom left.

C/P Element 23 on to the canvas.  Flip it horizontally, rotate it 15 degrees to the left and place it behind the elements on the left side.

C/P Element 37 on to the canvas.  Re size it twice.  Rotate it 15 degrees to the right and place it on the top right.  Add the same drop shadow as before but change the blur setting to 7.

C/P Element 39 on to the canvas.  Re size it twice.  Place it on the bottom right and behind the other elements.

C/P Element 41 on to the canvas.  Re size it three times.  Place it on the bottom right and in front of the other elements.  Make sure it is not covering the word art layer.

C/P Element 61 on to the canvas.  Re size it once.  Place it on the bottom left and behind Element 3.

C/P Element 64 on to the canvas.  Re size it once.  Place it on the left side and behind the other elements.

C/P Element 72 on to the canvas.  Place it on the top left and behind some of the paper layers.

C/P Element 102 on to the canvas.  Place it on the bottom and behind the other elements.

Paste Tube(s) of choice on to the canvas.  Re size it if needed.  Place to your liking.  Depending on the tube you choose you might have to move some of the elements around.

Add name and save as a pspimage.  Add any effects you would like.  Crop and re size the tag.  Save as a png and you are done.


Thank you for taking a look at my tut.  I hope you have enjoyed it.

Wednesday, May 27, 2015

Alexis

Alexis
©Barbara Butler
May 2015


Supplies:
Kit:  Alexis by Amy Marie.  This kit can be found at the following stores  www.amymarieskits.com,
PFD 
Tiny Turtle

Template:  Template 66 by Rachel.  This template can be found at Scraps of Enchantment.  This is an old template that I have had for years now so I don't have a link for it or know if the blog it was on is still active.  If anyone knows the link or knows if it is still active please let me know.

Open the template and check to make sure it is at 72DPI.  Duplicate it and close the original.  Delete the copyright layer and re size the canvas to a bigger size so the elements will fit.

Dark Grey Rectangle:  Select all, float, deflate.  Hit the delete key a couple of times and paste Pp3 into the selection, select none.

Black Square:  Select all, float, deflate.  Hit the delete key a couple of times and paste Pp8 into the selection, select none.

Light Grey Rectangle:  Select all, float, deflate.  Paste Pp17 as a new layer, invert the selection and hit the delete key, select none.  Close or delete the original layer.

C/P Element 3 on to the canvas.  Re size it twice, once by 75% then by 65%.  Place it on the right side.

C/P Element 10 on to the canvas.  Re size it by 65% three times.  Place it on the right side and in front of Element 3.

C/P Element 31 on to the canvas.  Re size it by 65% once.  Place it on the left side.

C/P Element 56 on to the canvas.  Re size it by 65% twice.  Place it to the right of Element 31.

C/P Element 76 on to the canvas.  Re size it by 65% twice.  Place it on the top left.

C/P Element 94 on to the canvas.  Re size it by 75% twice.  Place it on the left side and behind the other elements.

C/P Element 106 on to the canvas.  Re size it by 75% twice.  Place it on the right side and behind the other elements.

C/P Element 71 on to the canvas.  Re size it by 75% once.  Place it on the top of the square layer.  Add a gradient glow with settings of choice I used a light blue from my tag.

C/P Element 24 on to the canvas.  Re size it by 75% twice.  Flip it horizontally and place it on the left side of the square layer.  Duplicate it and merge the two together.

Paste Tube(s) of choice on to the canvas.  Re size it if needed.  Place to your liking.

Add name and save as a pspimage.  Add any effects you would like.  Crop and re size the tag.  Save as a png and you are done.

Thank you for taking a look at my tut.  I hope you have enjoyed it.

Tuesday, April 28, 2015

Suzy

Suzie
©Barbara Butler
April 2015


Supplies:
Kit:  Suzy Strawberry by Amy Marie.  This kit can be found at the following stores  www.amymarieskits.com, PFD
Mask:  WSL 84

New Image 800X600 72DPI

Select all, paste Pp10 into the selection, select none.  Apply the mask and merge the group.

C/P Element 2 on to the canvas.  Re size it by 75% once.  Place it on the left side and rotate it 15 degrees to the left.

C/P Element 9 on to the canvas.  Place it on the left side and behind Element 2.

C/P Element 21 on to the canvas.  Re size it by 75% once.  Place it on the left side and between Elements 2&9.

C/P Element 115 on to the canvas.  Re size it by 75% once.  Place it on the right side.

C/P Element 35 on to the canvas.  Re size it by 75% three times.  Place it on the right side and in front of Element 115.

C/P Element 97 on to the canvas.  Re size it by 75% twice.  Place it on the left side and in front of the other elements.

C/P Element 99 on to the canvas.  Re size it by 75% once.  Place it on the bottom and behind the other elements.

C/P Element 116 on to the canvas.  Re size it by 65% twice.  Place it on the left side and in front of the other elements.

C/P Element 123 on to the canvas.  Re size it by 50% twice.  Place it on the right side and in front of the other elements.

C/P Element 134 on to the canvas.  Place it on the left side and behind the other elements.

C/P Element 128 on to the canvas.  Re size it by 65% twice.  Rotate it 15 degrees to the left and on top of the rose so it looks like it is going to land on it.

C/P Element 127 on to the canvas.  Place it on the bottom and behind the other elements.

C/P Element 111 on to the canvas.  Place it on the right side and behind the other elements.

Paste Tube(s) of choice on to the canvas.  Re size it if needed.  Place to your liking.

Add name and save as a pspimage.  Add any effects you would like.  Crop and re size the tag.  Save as a png and you are done.

Thank you for taking a look at my tut.  I hope you have enjoyed it.

Friday, April 24, 2015

A Mothers Love

A Mothers Love
©Barbara Butler
April 2015


Supplies:
Kit:  Mothers Day by Amy Marie.  This kit can be found at the following stores www.amymarieskits.com, PFD
Mask:  WSL 145

New Image 850X638 72DPI

Select all, paste Pp9 into the selection, select none.  Apply the mask and merge group.

C/P Element 5 on to the canvas.  Re size it by 75% once.  Rotate it 15 degrees to the left and place it on the left side.

C/P Element 12 on to the canvas.  Re size it by 75% once.  Place it on the left side and in front of Element 5.

C/P Element 26 on to the canvas.  Re size it by 75% twice.  Flip it horizontally and place it on the right side.

C/P Element 11 on to the canvas.  Re size it by 75% three times.  Flip it horizontally and place it on the bottom right.

C/P Element 68 on to the canvas.  Re size it by 75% once.  Flip it horizontally and place it on the left side and behind the swan.

C/P Element 79 on to the canvas.  Re size it by 75% once.  Rotate it 15 degrees to the right and place it behind the elements on the right side.

C/P Element 98 on to the canvas.  Re size it by 75% twice.  Place it on the top right.

C/P Element 112 on to the canvas.  Re size it by 75% twice.  Place it on the bottom right and behind Elements 26 and 11.

C/P Element 132 on to the canvas.  Re size it by 75% once.  Place it on the bottom and in front of the other elements.

Back on the paper layer, select all>selections, modify, select selections border, width 5, inside checked> add a new layer, flood fill with a shade of pink from the flower element on the bottom right, do this a couple of times.  Add a gradient glow with a light shade of green from the tag.  Add an in bevel with the following settings:  Bevel 2, width 10, Smoothness Depth and Ambience all set to 1, Shininess set 0, the rest set on default settings.

C/P Element 117 on to the canvas.  Re size it by 65% twice.  Place it on the left side between the dog and swan.

Paste Tube(s) of choice on to the canvas.  Re size it if needed.  Place to your liking.

Add name and save as a pspimage.  Add any effects you would like.  Crop and re size the tag.  Save as a png and you are done.

Thank you for taking a look at my tut.  I hope you have enjoyed it.

Sunday, April 19, 2015

Superfreak

Superfreak
©Barbara Butler
April 2015


Supplies:
Kit:  Kristina Superfreak by Amy Marie.  This kit can be found at the following stores www.amymarieskits.com, PFD
Template:  343 by Millies PSP Madness.

Open up the template and check to make sure it is at 72DPI.  Duplicate it and close the original.  Delete the copyright layer and re size the canvas so the elements will fit later on.

Layers 1&6:  Select all, float, deflate.  Paste Pp15 into the selection, select none.

Layers 2&3:  Select all, float, deflate.  Paste Pp7 as a new layer, invert the selection and hit the delete key, select none.  Close or delete the original layer.

Layer 4:  Select all, float, deflate.  Paste Pp14 as a new layer, invert the selection and hit the delete key, select none.  Close or delete the original layer.

Layers 5&7:  Select all, float, deflate.  Paste Pp11 as a new layer, invert the selection and hit the delete key, select none.  Close or delete the original layers.

Layers 8&9:  Select all, float, deflate.  Paste Pp10 as a new layer, invert the selection and hit the delete key, select none.  Close or delete the original layers.

C/P Element 15 on to the canvas.  Re size by 75% twice.  Place it on the bottom left.

C/P Element 19 on to the canvas.  Re size it by 75% once.  Place it on the top left.

C/P Element 38 on to the canvas.  Re size it by 75% once.  Place it on the right side.

C/P Element 45 on to the canvas.  Re size it by 75% once.  Place it on the top right.

C/P Element 96 on to the canvas.  Re size it by 75% twice.  Rotate it 15 degrees to the right and place it on the bottom right.

C/P Element 28 on to the canvas.  Re size it by 75% once.  Place it on the bottom and behind the other elements.

C/P Element 1 on to the canvas.  Re size it by 65% twice.  Place it on the top left. 

C/P Element 77(this can be found in the Adult Toys Element Folder) on to the canvas.  Re size it by 50% once, then by 75%.  Place it on the bottom right and in front of the other elements.

Paste Tube(s) of choice on to the canvas.  Re size it if needed.  Place to your liking.  Depending on the tube you use you might have to re size the word art layer.

Add name and save as a pspimage.  Add any effects you would like.  Crop and re size the tag.  Save as a png and you are done.

Thank you for taking a look at my tut.  I hope you have enjoyed it.

Alyssa

Alyssa
©Barbara Butler
April 2015


Supplies:
Kit:  Alyssa by Amy Marie.  This kit can be found at the following stores Amy Maries Kits, PFD, Scrapping Your Memories

Template:  541 by Millies PSP Madness

Open the template and check to make sure it is at 72DPI.  Duplicate it and close the original.  Delete the copyright layer and re size the canvas to a bigger size so the elements will fit properly.

Layers 7&9:  Select all, float, deflate.  Paste Pp11 into the selection, select none.

Layers 4&5:  Select all, float, deflate.  Paste Pp10 into the selection, select none.

Layers 3&6:  Select all, float, deflate.  Paste Pp4 into the selection, select none.

Layer 2:  Select all, float, deflate.  Paste Pp6 into the selection, select none.

Layer 1:  Select all, float, deflate.  Paste Pp16 into the selection, select none.

Layers 11&12:  Select all, float, deflate.  Paste Pp6 into the selection, select none.  Place the words inside the squares.

Layer 15:  Delete this layer.  Delete the heart layers as well.

C/P Element 3 on to the canvas.  Re size it by 75% once.  Place it on the bottom.

C/P Element 7 on to the canvas.  Re size it by 75% once.  Rotate it 15 degrees to the left and place it on the left side.

C/P Element 9 on to the canvas.  Re size it by 65% twice.  Place it on the top right.

C/P Element 17 on to the canvas.  Re size it by 65% twice.  Place it on the bottom left and in front of the other elements.

C/P Element 32 on to the canvas.  Re size it by 65% twice.  Place it on the bottom right.

C/P Element 35 on to the canvas.  Re size it by 65% once.  Place it on the right side and behind the other elements and the word art.

C/P Element 42 on to the canvas.  Re size it by 65% twice.  Place it on the left side and in front of the other elements.

C/P Element 84 on to the canvas.  Re size it by 65% twice.  Place it on the bottom right and in front of the other elements.

C/P Element 89 on to the canvas.  Re size it by 65% once.  Place it on the right side and behind the other elements.

C/P Element 50 on to the canvas.  Re size it by 65% once.  Place it on the bottom and in front of the other elements except the key.

C/P Element 44 on to the canvas.  Re size it by 65% twice.  Place it on the bottom left and in front of the other elements.

Paste Tube(s) of choice on to the canvas.  Re size it if needed.  Place to your liking.

Add name and save as a pspimage.  Add any effects you would like.  Crop and re size the tag.  Save as a png and you are done.

Thank you for taking a look at my tut.  I hope you have enjoyed it.

Wednesday, April 15, 2015

Friday, March 27, 2015

Roses

Roses
©Barbara Butler
March 2015


Supplies:
Kit:  Roses by Amy Marie.  This kit can be found at the following stores Here,  PFD Here,
Inzpired Creationz Here, Scrapping Your Memories Here
New Image 800X600 72DPI.

C/P Element 5 on to the canvas.  Place it towards the bottom of the canvas.  Using the deform tool stretch it out just a little bit the left and to the right.

C/P Element 4 on to the canvas.  Place it behind the Element 5.  With the magic wand click on the outside of the frame.  Expand the selection by 16, invert the selection, add a new layer and paste Pp20 into the selection, select none.

C/P Element 6 on to the canvas.  Re size it by 75% twice.  Flip it horizontally and place it on the left side and in front of the other elements.

C/P Element 9 on to the canvas.  Place it on the right side and in front of the other elements.

C/P Element 22 on to the canvas.  Place it on the top left and rotate it 30 degrees to the left.

C/P Elements 32&33 on to the canvas.  Re size them both by 65% twice.  Place them on the left side.

C/P Element 43 on to the canvas.  Place it on the right side and behind the other elements.

C/P Element 94 on to the canvas.  Re size it by 65% twice.  Place it on the bottom right.

C/P Element 31 on to the canvas.  Place it on the left side and behind everything else.  Rotate it 30 degrees to the left.  Duplicate it, flip the duplicate horizontally and place it on the right side and rotate it 15 degrees to the left.

Paste Tube(s) of choice on to the canvas.  Re size it if needed.  Place to your liking.  If you use a tube that is sitting like mine paste it on to the canvas before all the elements on the bottom (except for Element 5.

Add name and save as a pspimage.  Add any effects you would like.  Crop and re size the tag.  Save as a png and you are done.

Thank you for taking a look at my tut.  I hope you have enjoyed it.

Saturday, January 31, 2015

Sweet Heart

Sweet Heart
©Barbara Butler
January 2015


Supplies:
Kit:  SweetHeart by Amy Marie.  This kit can be found at www.amymarieskits.com
Mask:  DD_FM_2015_6 by Dee.  You can fine the link to her site over on the side.

New Image 800X600 72DPI.

Select all, paste Pp18 into the selection, select none.  Apply the mask and merge the group.  Duplicate it and merge the two together.

C/P Element 19 on to the canvas.  Leave it right where it is at.

C/P Element 3 on to the canvas.  Re size it twice once by 50% then by 85%.  Flip it horizontally and place it on the right side.

C/P Elemenet 6 on to the canvas.  Re size it twice, once by 65% then by 75%.  Place it on the left side.

C/P Element 23 on to the canvas.  Re size it by 75% twice.  Place it on the bottom.

C/P Element 42 on to the canvas.  Re size it by 75% twice.  Place it on the top left.

C/P Element 43 on to the canvas.  Re size it by 75% twice.  Place it on the top right.

C/P Element 46 on to the canvas.  Place it on the right side and in behind the other elements.

C/P Element 53 on to the canvas.  Re size it by 75% three times.  Place it between the heart O and the Y of the word art element.

C/P Element 84 on to the canvas.  Place it to your liking.

Paste Tube(s) of choice on to the canvas.  Re size it if needed.  Place to your liking.

Add name and save as a pspimage.  Add any effects you would like.  Crop and re size the tag.  Save as a png and you are done.

Thank you for taking a look at my tut.  I hope you have enjoyed it.

Friday, November 14, 2014

Midnight Christmas

Midnight Christmas
©Barbara Butler
November 2014


Supplies:
Kit:  Midnight Christmas by Amy Marie.  This kit can be found at www.amymarieskits.com
Template:  660 by Millies PSP Madness.  You can fine the link to her site on the side.

Open template and check to make sure it is at 72DPI.  Duplicate the template and close the original.  Delete the copyright layer.  Re size the canvas to a little bit bigger size.

Layer 3:  Select all, float, defloat.  Paste Pp15 into the selection, select none.

Layer 4:  Select all, float, defloat.  Paste Pp6 into the selection, select none.

Layer 5:  Select all, float, defloat.  Flip Pp6 and paste it into selection, select none.

Layer 1:  Select all, float, defloat.  Paste Pp17 into the selection, select none.

Layers 6&7:  Select all, float, defloat.  Hit the delete key a couple of times and paste Pp6 into the selection, select none.  On Layer 7 flip the paper horizontally.

C/P Element 3 on to the canvas.  Re size it by 75% three times.  Place it on the bottom right side.

C/P Element 7 on to the canvas.  Re size it by 65% once.  Place it on the left side.

C/P Element 16 on to the canvas.  Re size it by 65% twice.  Flip it horizontally and place it on the top right.

C/P Element 50 on to the canvas.  Re size it by 65% twice.  Place it on the left side and behind the other elements.

C/P Element 61 on to the canvas.  Re size it by 65% once.  Place it on the rigth and behind the other elements and rotate it 15 degrees to the right.

C/P Element 76 on to the canvas.  Re size it by 65% once.  Flip it horizontally and place it on the top left.

C/P Element 80 on to the canvas.  Re size it by 75% once.  Place it on the bottom and behind the other elements.

C/P Element 96 on to the canvas.  Re size it by 65% once.  Place it on the bottom right and behind the puppies.

C/P Element 97 on to the canvas.  Re size it by 65% once.  Place it on the top left and behind the other elements.

C/P Element 85 on to the canvas.  Place it on the bottom and in front of Element 80.

C/P Element 74 on to the canvas.  Re size it by 65% once.  Place it on the left and behind the other elements.

C/P Element 46 on to the canvas.  Place it to your liking.

Paste Tube(s) of choice on to the canvas.  Re size it if needed.  Place to your liking.

Add name and save as a pspimage.  Add any effects you would like.  Crop and re size the tag.  Save as a png and you are done.

Thank you for taking a look at my tut.  I hope you have enjoyed it.

Sunday, October 19, 2014

Bright Dahlia

Bright Dahlia
©Barbara Butler
October 2014


Supplies:
Kit-Dahlia Bright by Amy Marie.  This kit can be found at www.amymarieskits.com
Mask:  Mask 41 by Mistress V.  I dont remember where I got this mask from so if anyone has a link to it and is willing to give it to me, I would appreciate it.  If you dont have this mask please feel free to use any that you have.
Plugin:  MuRa Miester's Copies

New Image 800X600 72DPI

Select all, paste Pp15 into the selection, select none.  Apply the mask and merge group.  Re size it by 75% once.  Select all, float, defloat.  Selections:  Modify, Select Selection Border, Expand by 9 Outside checked, add a new layer and flood fill with a pink color, I used the following shade #F19375

C/P Element 3 on to the canvas.  Re size it by 75% three times.  Place it on the bottom left.

C/P Element 4 on to the canvas.  Re size it by 65% once.  Place it on the bottom left and behind the slippers.

C/P Element 12 on to the canvas.  Re size it by 65% twice.  Flip it horizontally and place it on the bottom left.

C/P Element 25 on to the canvas.  Re size it by 75% three times.  Place it on the bottom left and behind the ballet slippers.

C/P Element 30 on to the canvas.  Re size it by 75% twice.  Apply Mura's Meister's Copies with the following settings:  Encircle, Number 12, Shift X 59, and Shift Y 69 the rest at default settings.  Place it behind the other elements and re size it by 85% once.

C/P Element 32 on to the canvas.  Flip it horizontally and place it on the bottom right.

C/P Element 56 on to the canvas.  Re size it by 65% three times.  Apply Mura's Copies using the following settings:  Encircle, Number 5, Shift X 54, Shift Y 64, the rest at default settings.  Place it above Element 30.

C/P Element 60 on to the canvas.  Rotate it 15 degrees to the right. 

C/P Element 63 on to to the canvas.  Place it towards the left but not all the way.   Apply a drop shadow using the following settings:  V3, H4, OP86, Blur 5, color #972524

C/P Element 64 on to the canvas.  Place it on the right side.

C/P Element 104 on to the canvas.  Re size it by 65% twice.  Place it on the top left.

Add some drop shadows to the elements, using any setting you would like.

Paste Tube(s) of choice on to the canvas.  Re size it if needed.  Place to your liking.

Add name and save as a pspimage.  Add any effects you would like.  Crop and re size the tag.  Save as a png and you are done.

Thank you for taking a look at my tut.  I hope you have enjoyed it.


Monday, July 21, 2014

Romancing Ava

Romancing Ava
©Barbara Butler
July 2014


Supplies:
Kit-Romancing Ava by Amy Marie.  This kit can be found at www.amymarieskits.com
Mask:  Dianas Mask 64.  I dont remember where I got this mask from so if you know where it is from please let me know and I will get the proper credits for it.  But I do believe you can get this over at the Creative Misfits Blog.

New Image 800X600 72DPI.

Select all.  Paste Pp2 into the selection, select none.  Select all, float, defloat.  Selections, Modify, Modify Select Selection Border, Outside, Width Border3, add a new layer and flood fill with a cream color I used #efe3bd, Select none.  Merge the two layers together and re size it by 75% once.

C/P Element 9 on to the canvas.  Re size it by 75% twice.  Place it on the bottom left.

C/P Element 32 on to the canvas.  Re size it by 65% twice.  Flip it horizontally and place it on the bottom right.

C/P Element 36 on to the canvas.  Re size it by 50% twice.  Place it on the top right.

C/P Element 38 on to the canvas.  Re size it twice once by 50% then by 75%.  Rotate it 15 degrees to right and place it behind the cagt on the bottom right.

C/P Element 46 on to the canvas.  Re size it twice once by 45% then by 75%.  Flip it horizontally and place it on the top left.

C/P Element 51 on to the canvas.  Re size it by 45% once.  Place it behind the cat on the right side.

C/P Element 60 on to the canvas.  Re size it by 45% once.  Place it behind Element 9 on the left side.

C/P Element 69 on to the canvas.  Re size it twice once by 45% then by 75%.  Place it on the right side of Element 9.

C/P Element 91  on to the canvsas.  Re size it by 75% once.  Place it behind the elements on the left side.

C/P Element 43 on to the canvas.  Place it behind all the elements on the bottom.  With the deform tool stretch it out so it reaches the edge of the paper layer.

C/P Element 24 on to the canvas.  Re size it by 85% twice.  Place it on the top and behind the other elements.

C/P Element 61 on to the canvas.  Re size it by 75% four times.  Duplicate it and re size the duplicate by 75% once.  Merge the two together and place it on the right side and in front of the other elements.

Paste Tube(s) of choice on to the canvas.  Re size it if needed.  Place to your liking.

Add name and save as a pspimage.  Add any effects you would like.  Crop and re size the tag.  Save as a png and you are done.

Thank you for taking a look at my tut.  I hope you have enjoyed it.

Friday, July 18, 2014

Raspberry Vinaigrette

Raspberry Vinaigrette
©Barbara Butler
July 2014


Supplies:
Kit:  Raspberry Vinaigrette by Amy Marie.  This kit can be found at www.amymarieskits.com
Template/Mask:  Mask-WSL84

New Image 800X600 72DPI.

C/P Pp33 on to the canvas.  Apply the mask and merge the mask group.

C/P Element 1 on to the canvas.  Re size it by 65% once.  Place it on the right side.

C/P Element 3 on to the canvas.  Re size it by 65% twice then one more time by 75%.  Place it on the left side of Element 1.

C/P Element 4 on to the canvas.  Re size it by 75% three times.  Place it on the bottom left.

C/P Element 8 on to the canvas.  Re size it by 45% once.  Place it on the left side of Element 4.

C/P Element 12 on to the canvas.  Re size it by 75% once.  Place it behind the elements on the left side.

C/P Element 21 on to the canvas.  Re size it by 75% twice.  Place it behind the elements on the right side.

C/P Element 23 on to the canvas.  Re size it by 75% once then one more time by 65%.  Place it on the bottom left.

C/P Element 30 on to the canvas.  Re size it by 45% and one more time by 65%.  Place it on the bottom left.

C/P Element 74 on to the canvas.  Re size it by 65% twice.  Rotate it 15 degrees to the right and place it behind the elements on the right side.

C/P Element 36 on to the canvas.  Place it behind all of the other elements.  Click on the inside with the magic wand expand by 4, add a new layer and paste Pp27 into the selection, select none.  Move the paper below the frame.  Select all, float, defloat.  Add a new layer and paste Element 63 into the selection, select none.  Change the color of the wording to a dark red.

C/P Element 42 on to the canvas.  Re size it by 65% twice.  Place it on the top left.

Paste Tube(s) of choice on to the canvas.  Re size it if needed.  Place to your liking.

Add name and save as a pspimage.  Add any effects you would like.  Crop and re size the tag.  Save as a png and you are done.

Thank you for taking a look at my tut.  I hope you have enjoyed it.

Thursday, June 12, 2014

Eastern Princess

Eastern Princess
©Barbara Butler
June 2014


Supplies:
Kit-Easetern Princess by Amy Marie.  This kit can be found at www.amymarieskits.com
Template-155MPM by Millies Psp Madness

Open up template, make sure it is at 72DPI, duplicate it and close the original.  Delete the copyright and word art layers.  Re size the canvas to 899X778

Layer 8:  Select all, float, defloat.  Paste Pp13 into the selection and select none.

Layers 2&3:  Select all, float, defloat.  Paste Pp8 into the selection and select none.

Layer 7:  Select all, float, defloat.  Paste Pp9 into the selection and select none.

Layer 6:  Select all, float, defloat.  Pick two different colors from Paper 9 (I choose a yellow and black color), make a gradient out of the two and flood fill the layer.  Add an inner bevel and drop shadow of choice.  Select none.

Layer 4:  Select all, float,, defloat.  Paste Pp16 as a new layer invert the selection and hit the delete key, select none.  Close or delete the original layer.

Layer 1:  Select all, float, defloat.  Paste Pp14 into the selection and select none.

C&P Element 12 on to the canvas.  Re size it by 60% once.  Place it on the bottom left.

C&P Element 24 on to the canvas.  Re size it by 75% once.  Place it on the left side.

C&P Element 25 on to the canvas.  Re size it by 65% twice.  Place it on the left and behind Element 12.

C&P Element 45 on to the canvas.  Re size it by 65% twice.  Rotate it 15 degrees to the right and place it behind Element 12.

C&P Element 138 on to the canvas.  Re size it by 60% once.  Place it on the right side and behind the other elements.

C&P Element 46 on to the canvas.  Re size it by 45% once.  Place it on the right side.

C&P Element 43 on to the canvas.  Re size it by 60% once.  Place it on the right side.

C&P Element 35 on to the canvas.  Re size it by 60% once.  Place it on top of Element 43.

C&P Element 137 on to the canvas.  Re size it by 60% once.  Place it on the right side.

Paste Tube(s) of choice on to the canvas.  Re size it if needed.  Place to your liking.

Add name and save as a pspimage.  Add any effects you would like.  Crop and re size the tag.  Save as a png and you are done.

Thank you for taking a look at my tut.  I hope you have enjoyed it.

Saturday, May 24, 2014

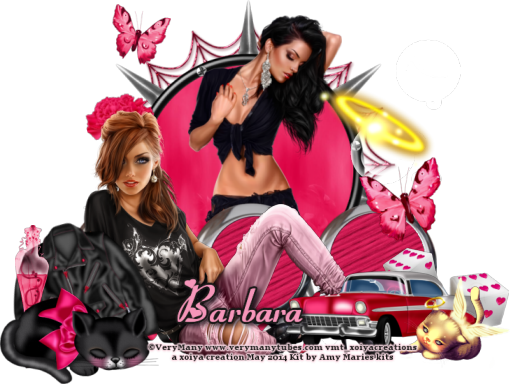
Melany

Melany
©Barbara Butler
May 2014


Supplies:
Kit-Melany by Amy Marie.  This kit can be found at www.amymarieskits.com

New Image 800X600 72DPI

C&P Element 48 on to the canvas.  Re size it by 75% once.  Place it on the bottom.  Click on the inside of each circle with the magic wand, expand by 6, add a new layer and paste Pp19 into the selection.  Select none and move the paper layer down below the frame.

C&P Element 46 on to the canvas.  Re size it by 85% once.  Place it behind Element 48.

C&P Element 47 on to the canvas.  Re size it by 75% once.  Place it in front of the spiderweb.  Close off all the other layers and click on the inside (you can open the other layers now), expand the selection by 6, add a new layer and paste Pp2 into the selection.  Select none, and move the paper down below the frame.

C&P Element 53 on to the canvas.  Re size it by 65% twice.  Place it on the bottom right.

C&P Element 56 on to the canvas.  Re size it by 45% once.  Place it on the bottom left.  Rotate it 15 degrees to the left.

C&P Element 54 on to the canvas.  Re size it by 65% once.  Place it behind Element 48 and the paper layer.  Rotate it 15 degrees to the left.

C&P Element 72 on to the canvas.  Re size it by 65% once.  Place it in front of the elements on the left side.

C&P Element 85 on to the canvas.  Re size it by 65% once.  Now take your selection tool and draw a rectangle around one of the butterflies, cut it out and paste it back on to the canvas.  Now place them both where you would like them.

C&P Element 96 on to the canvas.  Re size it by 45% once.  Place it behind the cat on the left side and to the left of the jacket.

C&P Element 102 on to the canvs.  Re size it by 45% once.  Place it behind the car on the right.

C&P Element 21 on to the canvas.  Re size it by 65% once.  Place it where you would like and if you want rotate it 15 degrees either to the left or to the right.

C&P Element 8 on to the canvas.  Re size it by 65% once.  Place it on the bottom and behind the other elements but leave it in the center.

C&P Element 26 on to the canvas.  Re size it by 65% once.  Place it on the right side and flip it horizontally.

C&P Element 27 on to the canvas.  Place it to your liking.

Paste Tube(s) of choice on to the canvas.  Re size it if needed.  Place to your liking.

Add name and save as a pspimage.  Add any effects you would like.  Crop and re size the tag.  Save as a png and you are done.

Thank you for taking a look at my tut.  I hope you have enjoyed it.

Monday, May 12, 2014

Pretty Linda

Pretty Linda
©Barbara Butler
May 2014


Supplies:
Kit-Pretty Linda by Amy Marie.  This kit can be found at www.amymarieskits.com
Mask-SG_Lacy-Edged
Effects-EyeCandy4000 Glass

New Image 800x600 72DPI

Select all and paste Pp30 into the selection.  Apply the mask and merge the mask group.  Before you apply the mask make sure the invert mask data is checked.  Re size by 65% once. 
C&P Pp9 on to the canvas.  With the magic wand click on the outside of the mask layer and  back on the paper layer hit the delete key.  Now take your selection tool and draw a rectangle around the middle square or you can do a custom selection with the following settings:  Top-153; Left-205; Right-595; Bottom-445, add a new layer and paste Pp6 into the selection.  Move both paper layers below the frame we had made. 
On the frame layer add an inner bevel and a drop shadow of choice.

C&P Element 109 on to the canvas.  Re size it by 65% three times.  Place it on the bottom right.

C&P Element 16 on to the canvas.  Re size it by 65% twice.  Place it in front of Element 109.

C&P Element 6 on to the canvas.  Re size it twice, once by 50% then again 65%.  Place it in the top left corner.

C&P Element 10 on to the canvas.  Re size it twice, once by 50% then by 65%.  Place it in the bottom left corner.

C&P Element 18 on to the canvas.  Re size it by 45% once.  Place it beside Element 10.

C&P Element 17 on to the canvas.  Re size it by 65% once.  Place it behind the other two elements on the left side.

C&P Element 30 on to the canvas.  Re size it by 65% once.  Flip it horizontally and place it behind the other elements on the right side.  Rotate it 15 degrees to the right.

C&P Element 31 on to the canvas.  Re size it by 65% once.  Place it on the left side and behind everything.  Duplicate it, flip the duplicate horizontally and place this one on the right side.  Merge the two together and add a drop shadow of choice.

C&P Element 29 on to the canvas.  Re size it where it is smaller then the other elements on the left side.  Place it on the left and in front of the other elements.

C&P Element 52 on to the canvas.  Re size it by 65% twice.  Place it on the right side and behind the other elements.  Flip it horizontally.

Paste Tube(s) of choice on to the canvas.  Re size it if needed.  Place to your liking.
Back on Pp6 select all, float, defloat, add a new layer and flood fill with the following color #dac5cb; effects, eye candy 4000, glass with the following settings:  Under Settings Tab fine Clear glass, back on the Basic tab change the Opacity to 72 and tinting to 1.  In the layer palette change the blend mode to compliment your tube.  I changed mine to multiply.  Make sure this layer is above the tube.
 

Add name and save as a pspimage.  Add any effects you would like.  Crop and re size the tag.  Save as a png and you are done.

Thank you for taking a look at my tut.  I hope you have enjoyed it.