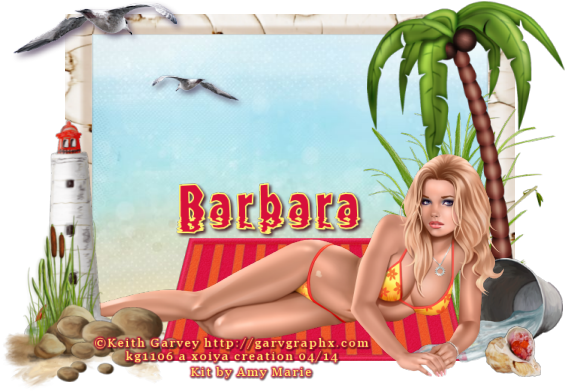
Pages

Sunday, April 27, 2014

Elodie Orange Cream


Orange Cream
I used the artwork of Keith Garvey for this tag.


Sunset Beach
I used the artwork of Jose Cano for this tag.


Kit can be found at www.amymarieskits.com

Bubbles


Bubbles
©Barbara Butler
April 2014


Supplies:
Kit-Rainbow Bubbles by Amy Marie.  This kit can be found at www.amymarieskits.com
Mask-WSL84

Select all and paste Pp20 into the selection, select none.  Apply the mask and merge the mask group.

C&P Element 34 on to the canvas.

C&P Element 15 on to the canvas.  Re size it by 75% once.  Place it on the bottom right.

C&P Element 11 on to the canvas.  Re size it by 45% once.  Place it on the top of the rainbow.

C&P Element 1 on to the canvas.  Re size it by 45% once.  Place it on the bottom left.

C&P Element 19 on to the canvas.  Re size it by 75% twice.  Place it on the bottom left and behind Element 1.

C&P Element 68 on to the canvas.  Re size it twice, once by 45% then by 75%.  Place it on the right side of the cloud.

C&P Elemengt 86 on to the canvas.  Place it on the bottom and behind the other elements except the rainbow.

Paste Tube(s) of choice on to the canvas.  Re size it if needed.  Place to your liking.

Add name and save as a pspimage.  Add any effects you would like.  Crop and re size the tag.  Save as a png and you are done.

Thank you for taking a look at my tut.  I hope you have enjoyed it.

Monday, April 21, 2014

Crista

Crista
©Barbara Butler
April 2014


Supplies:
Kit-Crista by Amy Marie.  This kit can be found at www.amymarieskits.com

New Image 800X600    72DPI

C&P Element 105 on to the canvas.  Click on the inside with the magic wand.  Expand the selection by 5, add a new layer, paste Pp5 into the selection.  Select none and move the paper below the window.  Back on the window add a drop shadow of choice.

C&P Element 110 on to the canvas.  Re size it by 65% twice.  Place it on the right side.

C&P Element 108 on to the canvas.  Re size it by 65% once.  Place it on the left side.  Flip it horizontally.

C&P Element 100 on to the canvas.  Re size it by 65% twice.  Place it on the right side and behind Element 110.

C&P Element 101 on to the canvas.  Re size it by 60% once.  Place it on the right side of Element 100.

C&P Element 90 on to the canvas.  Re size it by 65% once.  Place it on the left side and behind Element 108.

C&P Element87on to the canvas.  Re size it by 65% once.  Place it behind the other elements on the left side.

C&P Element 86 on to the canvas.  Re size it by 75% three times.  Place it on the top right.  Add a drop shadow of choice.

C&P Element 71 on to the canvas.  Re size it by 60% twice.  Place it on the left side of the elements on the right.

C&P Element 5 on to the canvas.  Place it on the right side and behind the other elements.

C&P Element 16 on to the canvas.  Re size it by 60% twice.  Place it on the top right and in front of the other elements.

Paste Tube(s) of choice on to the canvas.  Re size it if needed.  Place to your liking.  I'm using a tube I got from a wonderful group I was in that closed awhile ago but any tube will work.

Add name and save as a pspimage.  Add any effects you would like.  Crop and re size the tag.  Save as a png and you are done.

Thank you for taking a look at my tut.  I hope you have enjoyed it.

Saturday, April 19, 2014

Stars of Easter

Stars of Easter
©Barbara Butler
April 2014


Supplies:
Kit-Easter Stars by Amy Marie.  This kit can be found at www.amymarieskits.com
Template-150MPM by Milie Psp Madness

OPen up the template and check to make sure it is at 72DPI.  Duplicate it and close the original one.  Delete the copyright layer and layers 6&7.

Layer1-Select all, float, defloat.  Paste Pp20 as a new layer.  Invert the selection and hit the delete key, select none.  Close or delete the original layer.

Layer2-Select all, float, defloat.  Paste Pp18 as a new layer.  Invert the selection and hit the delete key, select none.  Close or delete the original layer.

Layer3-Select all, float, defloat.  Paste Pp15 as into the selection, select none.

Layer4-Select all, float, defloat.  Paste Pp4 as a new layer.  Invert the selection and hit the delete key, select none.  Close or delete the original layer.

Layer5-Select all, float, defloat.  Paste Pp11 into the selection, select none.

C&P Element 30 on to the canvas.  Flip it horizontally and place it on the left side.

C&P Element 33 on to the canvas.  Re size it by 70% once.  Place it on the bottom right.

Back on Layer5(the dark purple paper layer), C&P Element 80 on to the canvas.  Re size it by 70% once.  Place on the top circle.
C&P Element 81 on to the canvas.  Re size it by 70% once.  Place it to the left and behind the waterfall. 
C&P Element 78 on to the canvas.  Place it on the bottom and behind the other elements
Back on the paper layer select all, float, defloat.  Invert the selection and back on the element layers hit the delete key.  Select none.  Merge the three elements together and change the blend mode to Luminance(L).

C&P Element 34 on to the canvas.  Re size it by 50% once.  Place it on the bottom left and in front of the other elements. 

C&P Element 4 on to the canvas.  Place it on the right side and behind the other elements.

Paste Tube(s) of choice on to the canvas.  Re size it if needed.  Place to your liking.

Add name and save as a pspimage.  Add any effects you would like.  Crop and re size the tag.  Save as a png and you are done.

Thank you for taking a look at my tut.  I hope you have enjoyed it.

Wednesday, April 16, 2014

Ritas Easter

Ritas Easter
©Barbara Butler
April 2014


Supplies:
Kit-Rita's Easter by Amy Marie.  This kit can be found at www.amymarieskits.com
Template-566 by Millies Psp Madness
Mask-WSL84

Open up template and checked to make sure it is at 72DPI.  Duplicate it and close the original.  Delete the copy right layer.  Re size it to about 800X871.

Layers 1&2-Select all, float, defloat.  Paste Pp6 as a new layer, invert the selection and hit the delete key, select none.  Close or delete the original layers.

Layers 3&5-Select all, float, defloat.  Paste Pp5 as a new layer, invert the selection and hit the delete key, selet none.  Close or delete the original layers.

Layers 7&8-Select all, float, defloat.  Paste Pp21 into the selection, select none.

Layer 11-Select all, float, defloat.  Paste Pp16 as a new layer, invert the selection and hit the delete key, select none.  Close or delete the original layer.

Word Art Layers-Select all, float, defloat.  Paste Pp15 as a new layer, invert the selection and hit the delete key, select none.  Close or delete the original layers.  Repeat this for Layers 4&6 but instead of pasting as a new layer just paste into the selection.

Background Layer-Unhide, Select all, float, defloat.  Paste Pp7 as a new layer, invert the selection and hit the delete key.  Apply the mask and merge the mask group.  Close or delete the original layer.

C&P Element 3 on to the canvas.  Re size it by 75% once.  Place it on the right side.

C&P Element 6 on to the canvas.  Rotate it 15 degrees to the right and place it behind Element 3.

C&P Element 9 on to the canvas.  Re size it by 75% and place it behind Element 3.

C&P Element 12 on to the canvas.  Re size it by 65% once.  Place it on the left side.

C&P Element 15 on to the canvas.  Place it behind the other flowers on the left side.  Re size it by 75% once.

C&P Element 25 on to the canvas.  Re size it by 65% once.  Place it on the top right.

C&P Element 34 on to the canvas.  Re size it by 50% once.  Place it in front of the other elements on the left side.

C&P Element 68 on to the canvas.  Re size it by 75% once.  Place it on the left side and behind the other elements.  Duplicate it, flip it horizontally and place it on the right side.  Make sure these are both behind the other elements.

Paste Tube(s) of choice on to the canvas.  Re size it if needed.  Place to your liking.

Add name and save as a pspimage.  Add any effects you would like.  Crop and re size the tag.  Save as a png and you are done.

Thank you for taking a look at my tut.  I hope you have enjoyed it.

Tuesday, April 15, 2014

Spring Kiera

Spring Kiera
©Barbara Butler
April 2014


Supplies:
Kit-Spring Kiera by Amy Marie.  This kit can be found at www.amymarieskits.com

New Image 800X600 72DPI

C&P Element 86 on to the canvas.  Re size it by 65% once.  Place it on the bottom right.

C&P Element 84 on to the canvas.  Place it on the left side.

C&P Element 67 on to the canvas.  Place it behind the other two elements.

C&P Element 68 on to the canvas.  Place it on the left side and behind Element 84.

C&P Element 47 on to the canvas.  Re size it by 65% once.  Place it on the right side and behind Element 86.

C&P Element 25 on to the canvas.  Re size it by 65% once.  Place it to the right and behind Element 84.

C&P Element 18 on to the canvas.  Re size it by 65% twice.  Place it on top Element 67.

C&P Element 16 on to the canvas.  Re size it by 50% twice.  Flip it horizontally and place it on the right side of the mushroom house.

C&P Element 19 on to the canvas.  Re size it by 65% once.  Place it on the left side of the mushroom house and below the other elements.

C&P Element 20 on to the canvas.  Re size it by 50% once.  Place it to the right and on top of the log.

Paste Tube(s) of choice on to the canvas.  Re size it if needed.  Place to your liking.

Add name and save as a pspimage.  Add any effects you would like.  Crop and re size the tag.  Save as a png and you are done.

Thank you for taking a look at my tut.  I hope you have enjoyed it.

Easter Candles

Easter Candles
©Barbara Butler
April 2014


Supplies:
Kit- by Amy Marie.  This kit can be found at www.amymarieskits.com
Template-548mpm by Millie's Psp Madness

Open up template and check to make sure it is at 72DPI.  Duplicate it and close the original.  Delete the copyright and wordart layers.  Re size the canvas to about 800X744

Layers 1&2-Select all, float, defloat.  Paste Pp4 into the selection, select none.

Layer 3-Select all, float, defloat.  Paste Pp3 into the selection, select none.

Layers 4&5-Select all, float, defloat.  Paste Pp6 as a new layer.  Invert the selection and hit the delete key, select none.  Close or delete the original layers.

Layer 6-Select all, float, defloat.  Paste Pp7 into the selection, select none.

C&P Element 2 on to the canvas.  Re size it by 65% once.  Place it on the left side.

C&P Element 5 on to the canvas.  Re size it by 75% once.  Place it behind Element 2.

C&P Element 27 on to the canvas.  Re size it by 75% twice.  Place it on the top right.

C&P Element 56 on to the canvas.  Place it on the bottom right.

C&P Element 44 on to the canvas.  Place it on the bottom and behind the other elements.

C&P Element 3 on to the canvas.  Re size it by 65% once.  Place beside Element 2.

C&P Element 4 on to the canvas.  Re size it by 65% once.  Place it behind the rabbit on the right side.

Paste Tube(s) of choice on to the canvas.  Re size it if needed.  Place to your liking.

Add name and save as a pspimage.  Add any effects you would like.  Crop and re size the tag.  Save as a png and you are done.

Thank you for taking a look at my tut.  I hope you have enjoyed it.

Monday, April 14, 2014

Ladybug Picnic

Ladybug Picnic
©Barbara Butler
April 2014


Supplies:
Kit-Ladybug Garden by Amy Marie.  This kit can be found at www.amymarieskits.com
Mask-WSL194

New Image 800X600 72DPI

Paste Pp11 on to the canvas.  Apply the mask and merge the mask group.

C&P Element 130 on to the canvas.  Move towards the bottom.  Using the deform tool and stretch it out towards the edges.

C&P Element 14 on to the canvas.  Re size it by 50% once.  Place it on the left side.

C&P Element 15 on to the canvas.  Re size it by 50% twice.  Place it on the right side of Element 14.

C&P Element 33 on to the canvas.  Re size it by 50% once.  Place it on the right side.

C&P Element 35 on to the canvas.  Re size it by 50% twice.  Place it on the left side.

C&P Element 69 on to the canvas.  Re size it by 75% once.  Place it on the right side and behind the other elements.

C&P Element 73 on to the canvas.  Re size it by 75% twice.  Place it on the right side.  Flip it horizontally.

C&P Element 51 on to the canvas.  Re size it by 45% once.  Place it above the tree on the right side.

C&P Element 90 on to the canvas.  Place it behind all the other elements.  If any is sticking outside of the others use the eraser tool and delete some of it.  If its just poking out from the bottom a little bit just move it up a little.

C&P Element 93 on to the canvas.  Re size it by 45% once.  Now using the deform tool stretch it out with the top middle node until it reaches across to the other end of the water.  Place it to your liking I placed mine to where it is behind some of the elements on the right side.

Paste Tube(s) of choice on to the canvas.  Re size it if needed.  Place to your liking.

Add name and save as a pspimage.  Add any effects you would like.  Crop and re size the tag.  Save as a png and you are done.

Thank you for taking a look at my tut.  I hope you have enjoyed it.

Spring Romance

Spring Romance
©Barbara Butler
April 2014


Supplies:
Kit-Spring Romance by Amy Marie.  This kit can be found at www.amymarieskits.com
Mask-WSL194

New Image 800X600 72DPI

C&P Element 108 on to the canvas.  Move it towards the bottom.

C&P Element 110 on to the canvas.  Place it on the left side.

C&P Element 115 on to the canvas.  Place it on the bottom and behind the other elements.  Using the deform tool stretch it out a little bit.

C&P Element 97 on to the canvas.  Re size it by 45% once and place it in top center of the gate.

C&P Element 91 on to the canvas.  Re size it by 45% once and place it on the left side.

C&P Element 83 on to the canvas.  Re size it by 45% once and place it on the left side.

C&P Element 85 on to the canvas.  Re size it by 75% once and place it on the right side.

C&P Element 81 on to the canvas.  Place it on the left side and behind the other elements.

C&P Element 65 on to the canvas.  Re size it by 50% once and place it on top of the gate and on the left side.

C&P Element 29 on to the canvas.  Re size it by 45% once and place it on the right side of the swan.

C&P Pp18 on to the canvas.  Send to the bottom.  Apply the mask and merge the mask group.

Paste Tube(s) of choice on to the canvas.  Re size it if needed.  Place to your liking. 

Add name and save as a pspimage.  Add any effects you would like.  Crop and re size the tag.  Save as a png and you are done.

Thank you for taking a look at my tut.  I hope you have enjoyed it.

Sunday, April 13, 2014

Diva In The City

Diva In The City
©Barbara Butler
April 2014


Supplies:
Kit-Chic Named Diva by Amy Marie.  This kit can be found at www.amymarieskits.com
Mask-WSL252

New Image 800X600 72DPI.

Select all and paste Pp7 into th selection.  Apply the mask and merge the mask group.  Keep selected add a new layer and paste Pp17 into the selection, change the blend mode Luminance(L).  Now C&P CU of the tube you use invert the selection and hit the delete key, select none and change the blend mode to Luminance(L), duplicate the tube and change the blend mode of this one to Overlay.  Add a drop shadow to the original layer.  (You will be adding the main tube later on).

C&P Element 152 on to the canvas.  Re size it by 65% once.  Place it on the right side.

C&P Element 156 on to the canvas.  Re size it by 65% twice.  Place it on the left side of Element 152.

C&P Element 93 on to the canvas.  Re sizse it by 50% once and place to the right and behind Element 156.

C&P Element 87 on to the canvas.  Re size it by 65% once.  Flip it horizontally and place it behind the statue.

C&P Elements 69&70 on to the canvas.  Re size them by 50% once and place 69 in the top left corner and the 70 in the top right corner.

C&P Element 9 on to the canvas.  Place it on the right side and behind the other elements.

C&P Element 133 on to the canvas. Re size it by 65% once.  Place it behind the elements on the right side.

Paste Tube(s) of choice on to the canvas.  Re size it if needed.  Place to your liking.

Add name and save as a pspimage.  Add any effects you would like.  Crop and re size the tag.  Save as a png and you are done.

Thank you for taking a look at my tut.  I hope you have enjoyed it.

Treasured Moments 2

Treasured Moments2
©Barbara Butler
April 2014


Supplies:
Kit- Treasured Moments 2 by Amy Marie.  This kit can be found at www.amymarieskits.com
Template-547mpm by Millies Psp Madness

Open up template and check to make sure it is at 72DPI.  Duplicate it and close the original.  Delete the copyright layer.  Re size the canvas to about 832X665.

Layer 8-Select all, float, defloat.  Paste Pp23 as a new layer.  Invert the selection and hit the delete key, select none.  Close or delete the original layer.

Layer 7-Select all, float, defloat.  Paste Pp17 as a new layer.  Invert the selection and hit the delete key, select none.  Close or delete the original layer.

Layers 6&5-Select all, float, defloat.  Paste Pp20 into the selection.  Select none.

Layers 4&3-Select all, float, defloat.  Paste Pp14 into the selection.  Select none.

Layers 2&1-Select all, float, defloat.  Paste Pp6 into the selection.  Select none.

C&P Element 2 on to the canvas.  Re size it by 65% twice and place it on the bottom right.

C&P Element 4 on to the canvas.  Re size it by 50% once.  Place it to the right and behind Element 2.  Rotate it 15 degrees to the left.

C&P Element 13 on to the canvas.  Re size it by 50% once.  Flip it horizontally and place it on the bottom left.

C&P Element 16 on to the canvas.  Re size it by 50% once.  Rotate it 15 degrees to the left and place it behind the shell on the left side.

C&P Element 25 on to the canvas.  Re size it by 65% once.  Place it behind the elements on the right side.

C&P Element 38 on to the canvas.  Re size it by 45% once.  Place it on the left.

C&P Element 55 on to the canvas.  Re size it by 65% once.  Flip it horizontally and place it behind the elements on the left side.  Re size the shell and pillow one more time by 75%.

C&P Element 58 on to the canvas.  Place it on the right side and send it to the bottom.

C&P Element 61 on to the canvas.  Bring it to the top and place it behind the other elements.

C&P Element 132 on to the canvas.  Re size it by 75% once.  Place it on the top right.

Paste Tube(s) of choice on to the canvas.  Re size it if needed.  Place to your liking.

Add name and save as a pspimage.  Add any effects you would like.  Crop and re size the tag.  Save as a png and you are done.

Thank you for taking a look at my tut.  I hope you have enjoyed it.

Saturday, April 12, 2014

Spring Has Sprung

Spring Has Sprung
©Barbara Butler
April 2014


Supplies:
Kit-Spring Is Here by Amy Marie.  This kit can be found at www.amymarieskits.com

C&P Element 33 on to the canvas.  Re size it by 75% once. Click on the inside with the magic wand expand the selection by 5.  Add a new layer and paste Pp6 into the selection, select none.

C&P Element 14 on to the canvas.  Re size it by 45% once and place it on the bottom left.

C&P Element 34 on to the canvas.  Re size it by 75% once.  Flip it horizontally, rotate it 15 degrees to the left and place it behind the frog.

C&P Element 56 on to the canvas.  Re size it by 75% once.  Place it on the bottom.

C&P Element 55 on to the canvas.  Place it behind the other elements on the bottom.

C&P Element 95 on to the canvas.  Re sizeit by 45% once.  Place it beind the frog and duplicate it twice.

C&P Element 102 on to the canvas. Re size it by 45% once and place it on the top right.

C&P Element 107 on to the canvas.  Re size it by 65% once and place it behind Element 95. 

C&P Element 109 on to the canvas.  Re size it by 65% once and place it on the bottom right.

C&P Element 97 on to the canvas.  Re size it by 45% once and place it on the bottom right and in front of the other elements.

C&P Element 127 on to the canvas.  Re size it by 65% once and place it on the left side.

C&P Element 125 on to the canvas.  Place it on the left side and send it to the bottom.  Duplicate it and mirror it and place it on the right side.

C&P Element 129 on to the canvas.  Re size it by 65% once and place it on the right side but keep it behind the frame and paper layers.

C&P Element 118 on to the canvas.  Place it on the right side, and just in front of the frame.

C&P Element 115 on to the canvas.  Re size it by 65% once and place it on the top left.

C&P Element 108 on to the canvas.  Place it on the bottom and in front of the fence.

Paste Tube(s) of choice on to the canvas.  Re size it if needed.  Place to your liking.

Add name and save as a pspimage.  Add any effects you would like.  Crop and re size the tag.  Save as a png and you are done.

Thank you for taking a look at my tut.  I hope you have enjoyed it.

Wednesday, April 9, 2014

Flower Bunny

Flower Bunny
©Barbara Butler
April 2014


Supplies:
Kit-Flower Bunny by Amy Marie.  This kit can be found at www.amymarieskits.com
Mask-WSL194

New Image 800X600 72DPI.

Select all and paste Pp25 into the selection, select none.

C&P Element 13 on to the canvas.  Re size it by 75%.  With the deform tool expand it to the edges.  Change the blend mode to hard light.

C&P Element 29 on to the canvas.  Place it in the top right hand corner.  Change the blend mode to Luminance (L).

Merge these three together.  You'll want to merge visible and not merge them one by one or the blend will be off.

C&P Element 46 on to the canvas.  With the selection tool draw a rectangle around the middle.  Add a new layer and go to the merged layer and hit copy, and paste this into the selection.  Select none, move below the window.  If you can see any outside of the window take the eraser tool and delete some of it.  Close or delete the merged group.  Re size both by 75% once.

C&P Element 57 on to the canvas.  Re size it by 50% once and place it on the right side.

C&P Element 59 on to the canvas.  Re size it by 50% once, flip it horizontally and place it on the left side.

C&P Element 64 on to the canvas.  Place it on the bottom left behind the bunny.  Duplicate it, flip horizontally and place it on the right side and behind the dog.

C&P Element 66 on to the canvas.  Place it on the left side and behind the other two elements.  Rotate it 15 degrees to the left.

C&P Element 86 on to the canvas.  Re size it by 50% twice.  Place it on the top.

C&P Element 90 on to the canvas.  Re size it by 75% once. Place it behind the dog.

C&P Element 110 on to the canvas.  Re size it by 45% twice.  Place it on the top right.

Paste Tube(s) of choice on to the canvas.  Re size it if needed.  Place to your liking.

Add name and save as a pspimage.  Add any effects you would like.  Crop and re size the tag.  Save as a png and you are done.

Thank you for taking a look at my tut.  I hope you have enjoyed it.

Sunday, April 6, 2014

Bunny Trail

Bunny Trail
©Barbara Butler
April 2014


Supplies:
Kit-Bunny by Amy Marie.  This kit can be found at www.amymarieskits.com
Mask-WSL84

New Image 800X600 72 DPI

C&P Element 104 on to the canvas. Re size it by 75% once and move it towards the bottom.

C&P Element 98 on to the canvas.  Place it behind the fence, duplicate it, flip the duplicate horizontally and merge the two together.

C&P Element 96 on to the canvas.  Re size it by 75% once.  Place it on the left side of the fence and in front of it.

C&P Element 72 on to the canvas.  Re size it by 75% twice. Place it in front of the fence.

C&P Element 62 on to the canvas.  Re size it by 75% twice.  Place it on the left side of Element 72.

C&P Element 45 on to the canvas.  Re size it by 75% twice and place it on the right side of Element 72.

C&P Element 39 on to the canvas.  Re size it by 65% twice.  Place it on the right side of the tree.  Rotate it 15 degrees to the right.  Duplicate it, re size the duplicate by 65% once and move it where you would like.

C&P Element 7 on to the canvas.  Re size it by 65% twice.  Place it on the right side.

C&P Element 23 on to the canvas.  Re size it by 65% twice and place it on the right side behind the eggs.

Select all, add a new layer and paste Pp7 into the selection.  Send it to the bottom and apply the mask.  Merge the mask group.

Paste Tube(s) of choice on to the canvas.  Re size it if needed.  Place to your liking.

Add name and save as a pspimage.  Add any effects you would like.  Crop and re size the tag.  Save as a png and you are done.

Thank you for taking a look at my tut.  I hope you have enjoyed it.